Books & Bordeaux
Book Reviews, Discussion Guides, and Wine-Book Pairings
“Call no man happy until he is dead. Herodotus.” Mr. Nancy raised a white eyebrow, and he said, “I’m not dead yet, and, mostly because I’m not dead yet, I’m happy as a clamboy.” “The Herodotus thing. It doesn’t mean that the dead are happy,” said Shadow. “It means that you can’t judge the shape of someone’s life until it’s over and done.”
How to Make a Kids Spinning Therapy Board


- Difficulty: Easy
- Cost: $50-100
- Time: ~ 1.5 hour to assemble
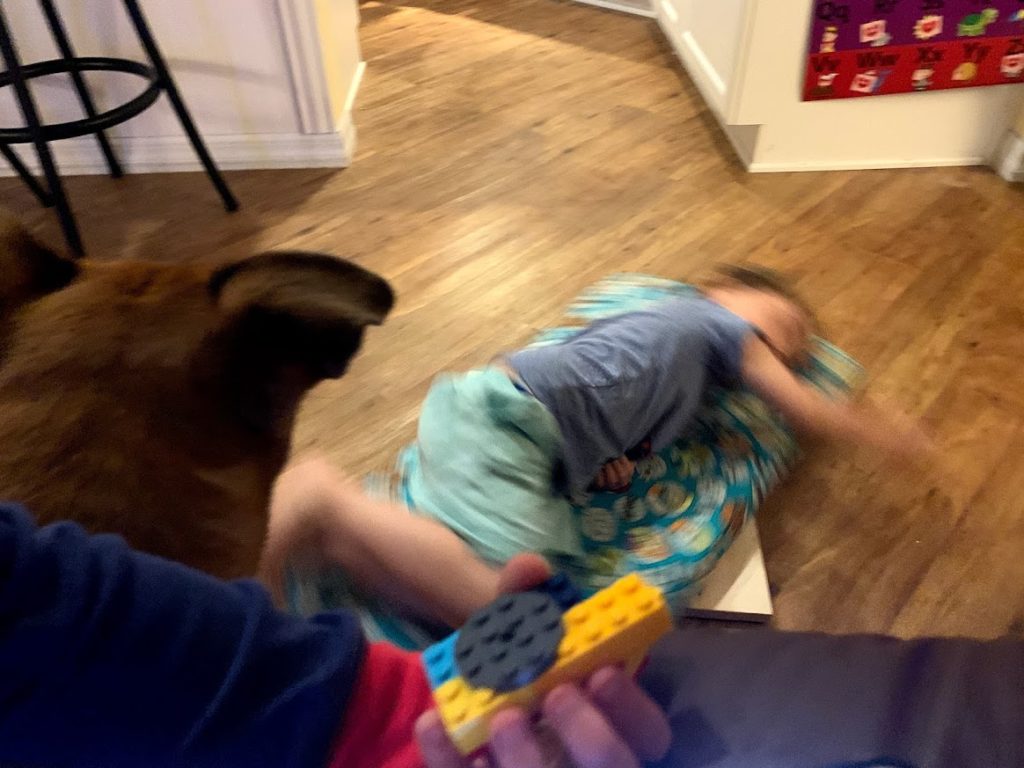
Our kids love this fun spinning floor toy—they’ll randomly pull it out and take a spin, usually on their own but every once in a while, as a team! (So cute!) For whatever reason you can’t find this type of spinning toy online or in a store? I imagine most kids would love spinning just for the fun of it, but we came across it in a therapy setting. It’s sometimes offered to children as part of sensory integration therapy for those with sensory processing disorders or autism spectrum disorder. Spinning can be fun and soothing, and this toy is a great option!
(If you don’t want to go through the trouble of making something or you just want to see what else is out there for helping children develop their vestibular system (a goal of sensory integration therapy), this Ultimate List of Sensory Toys & Tools has some amazing toys you can buy pre-made!)
Here’s How to Make the Full-Body Therapy Spinning Toy Yourself!
Materials & Tools
- Laminated spruce panel board ¾ inch x 16 inch x 4 foot
- 6-inch Lazy Susan
- Flat-head screws #6 5/8 inch
- Self-adhesive pads
- Foam from craft store (to cover 16×32 inch surface, 1-2 inches depth)
- Fabric from craft store (2 yards) (we used scooby-doo fabric 😊)
- Screw driver
- Drill
- Quarter-inch drill bit
- Pencil (for marking)
- Staple gun
- Flashlight (recommended)
Steps
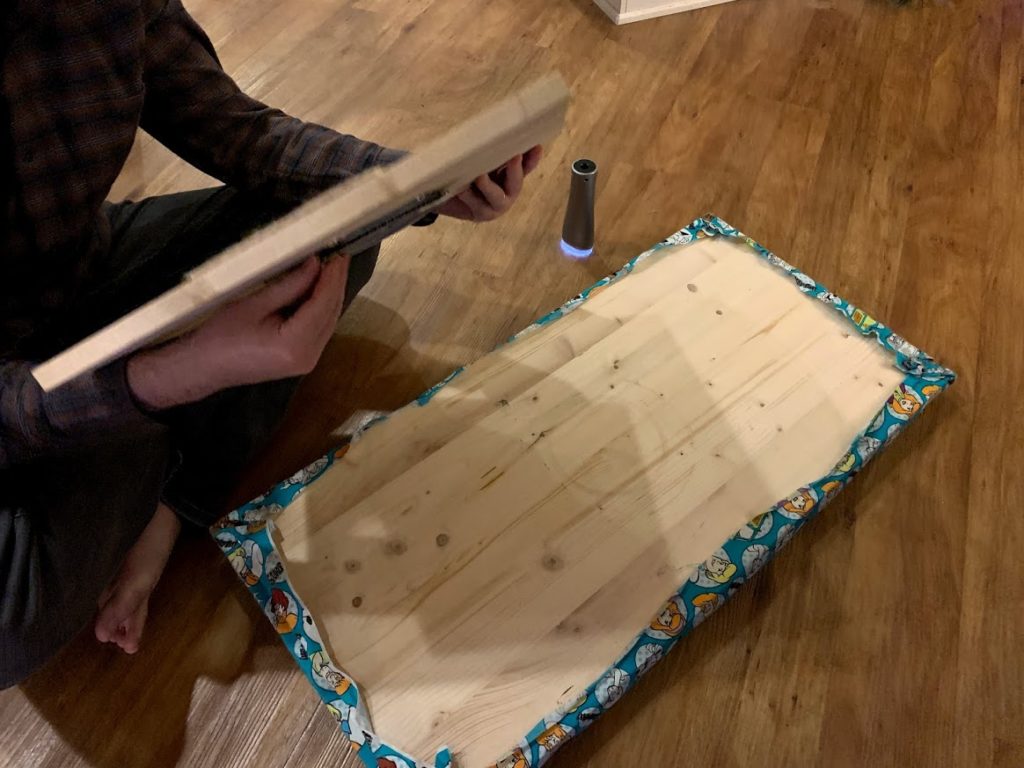
- Take a laminated spruce panel board to the cutting area at Home Depot/Lowe’s and ask them to cut 16 inches off one side, making two pieces: 1 square base of 16×16 inches and 1 long surface board of 32×16 inches.
On the 32×16 inch board:
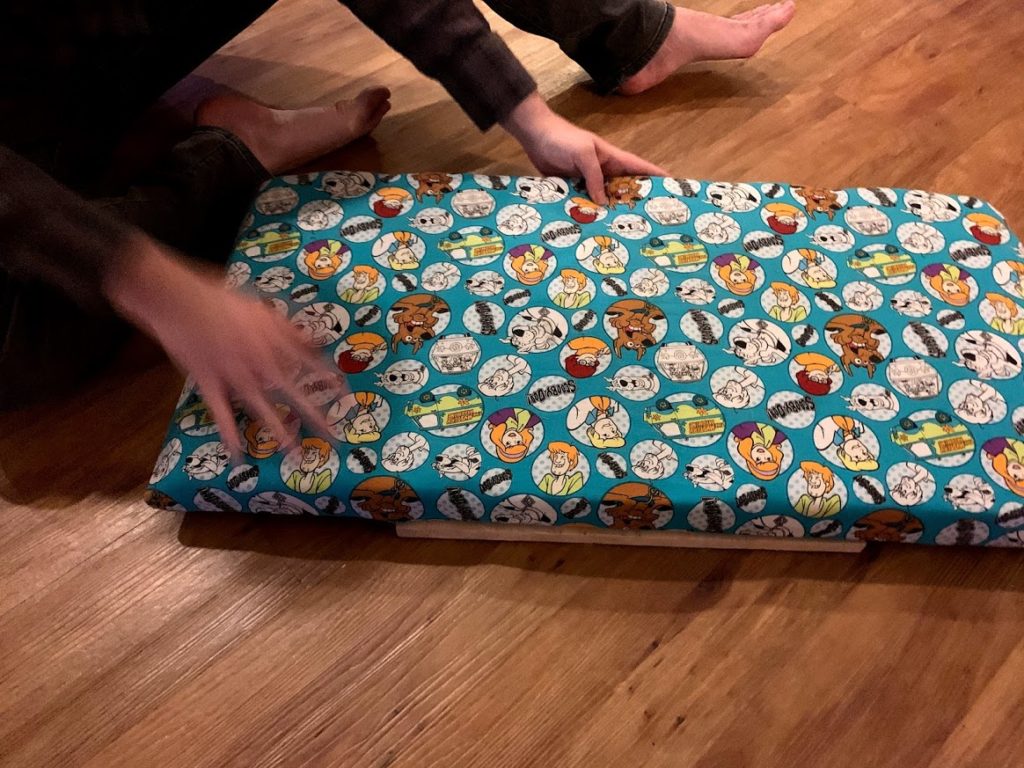
- Upholster the large board with foam padding and fabric, pulling the fabric taut. You may need to cut the foam to the correct size depending on the piece you bought. We used a staple gun to secure the fabric on the back, and then trimmed the excess fabric off with scissors.
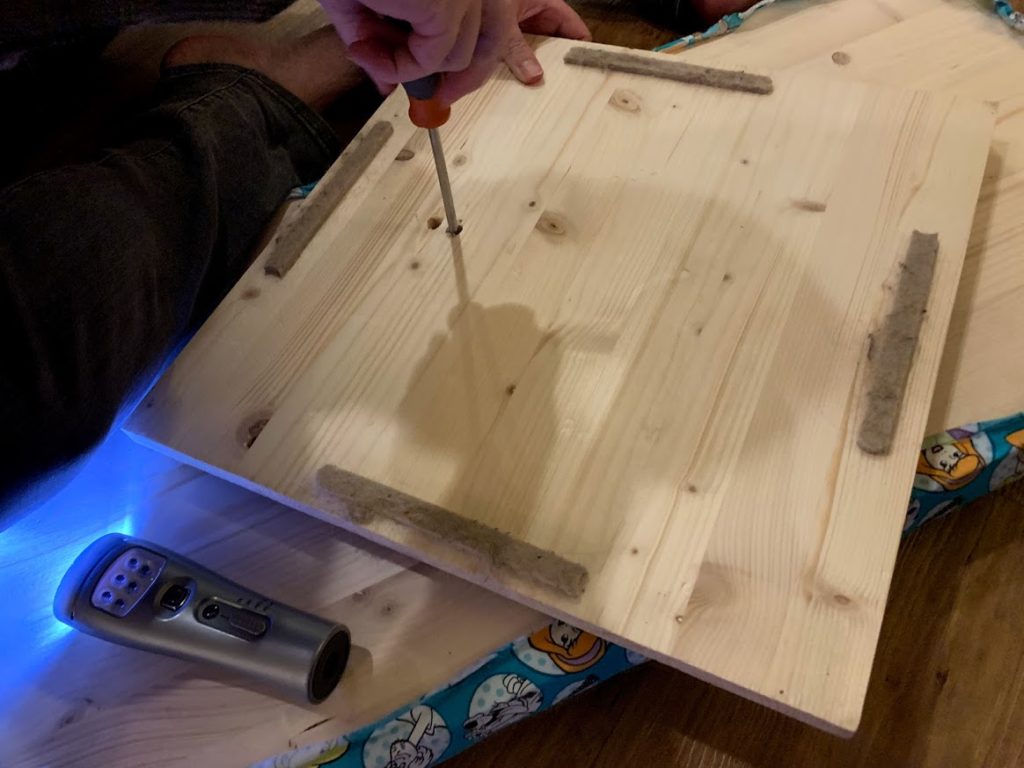
On the 16×16 inch base board:
- Take the 6-inch lazy susan. Center on 16×16 board. Pivot top piece 45 degrees to allow you to view mounting holes. Drill in using screws (see Materials list for more detail).
- While the top piece is turned 45 degrees, use a pencil to mark through the hole onto the board below, then rotate another 45 degrees (to move it out of the way), then drill a quarter-inch hole all the way through. (This will allow you to see the mount hole in the big board once you screw it in place.)
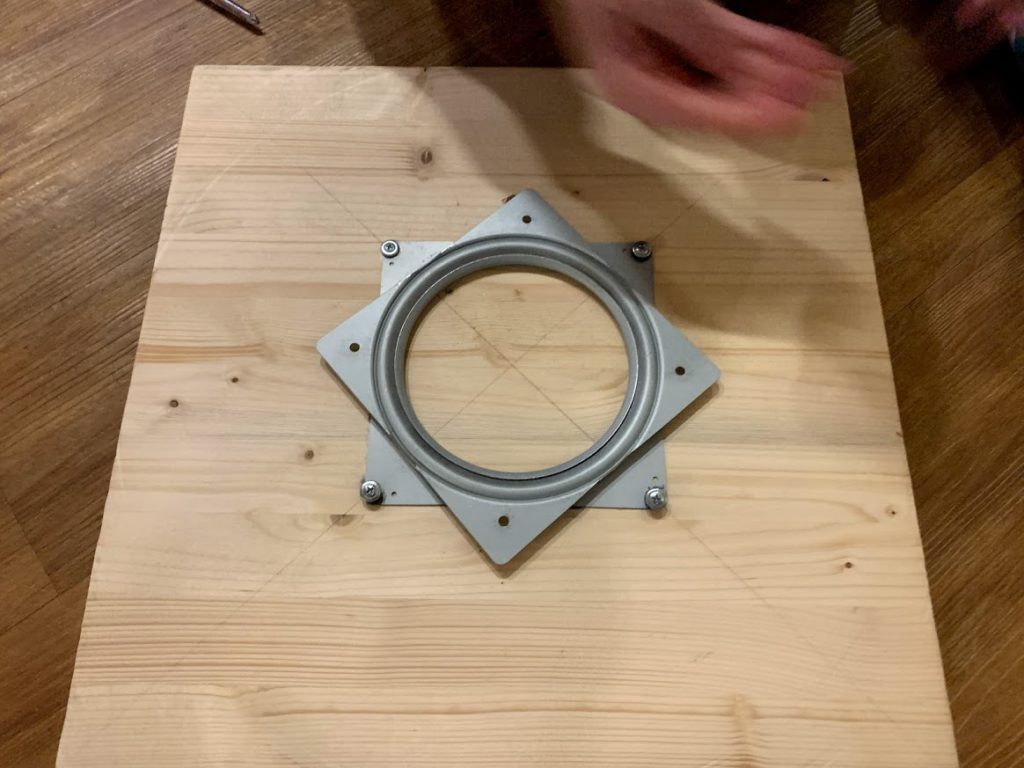
- Flip board over. Place heavy duty adhesive pads on the bottom of the 16×16 board (for grip).
Combine the base board and the large board:
- Place the large board upholster-side down on the floor. Place the smaller board on top, centered, with the adhesive pads facing up.
- Screw each of the lazy susan mounts into the large board through the hole you drilled in the 16×16 board. Use a flashlight to guide you if you have one handy.
- You’re all done! Flip over and start spinning!
Note: (Optional) If you are an engineer like my husband and you want to be extra careful to not crack the board, you can pre-drill the screw holes by marking the board where the screw holes will go using a very small drill-bit (slightly narrower than the threads of the screw) and then screwing into that pre-drilled hole.
Note: These pictures actually show us re-assembling our spinner (not making it for the first time), as the screws loosened after two years of spinning and we had to go back, disassemble, and tighten them—which was relatively easy!
For More about Sensory Processing Disorders and Therapies…
Check out the following recommended books:

